How to Migrate your WordPress Website using a Plugin
Overview
In this article, you will learn how to migrate your WordPress website in to your iManila hosting account.
What is a migration?
A migration is when you move a website or application and data from one environment to an another. In this example, we are going to migrate a WordPress website from an old hosting provider to your iManila shared hosting account.
Note: There are many ways to migrate a WordPress website. This is just one of them.
Prerequisites
- Access to your old hosting account (source)
- Admin access to your domain for DNS pointing.
- Admin access to your WordPress website
- Admin access to your iManila hosting account (target)
It is important to note that while most Linux environment and cPanel-based hosting solutions can host a WordPress website, some older WordPress and plugin versions may not work properly with up-to-date environment. Older WordPress and plugin versions may not work with updated MySQL and or PHP versions. To view your iManila shared server information, go to cPanel >> Home >> Server Information. In this example, we assume that you have an up-to-date WordPress installation.
Prepare your target host
- Login to your iManila Shared Hosting account cPanel.
- Navigate to cPanel >> Applications >> WordPress toolkit.
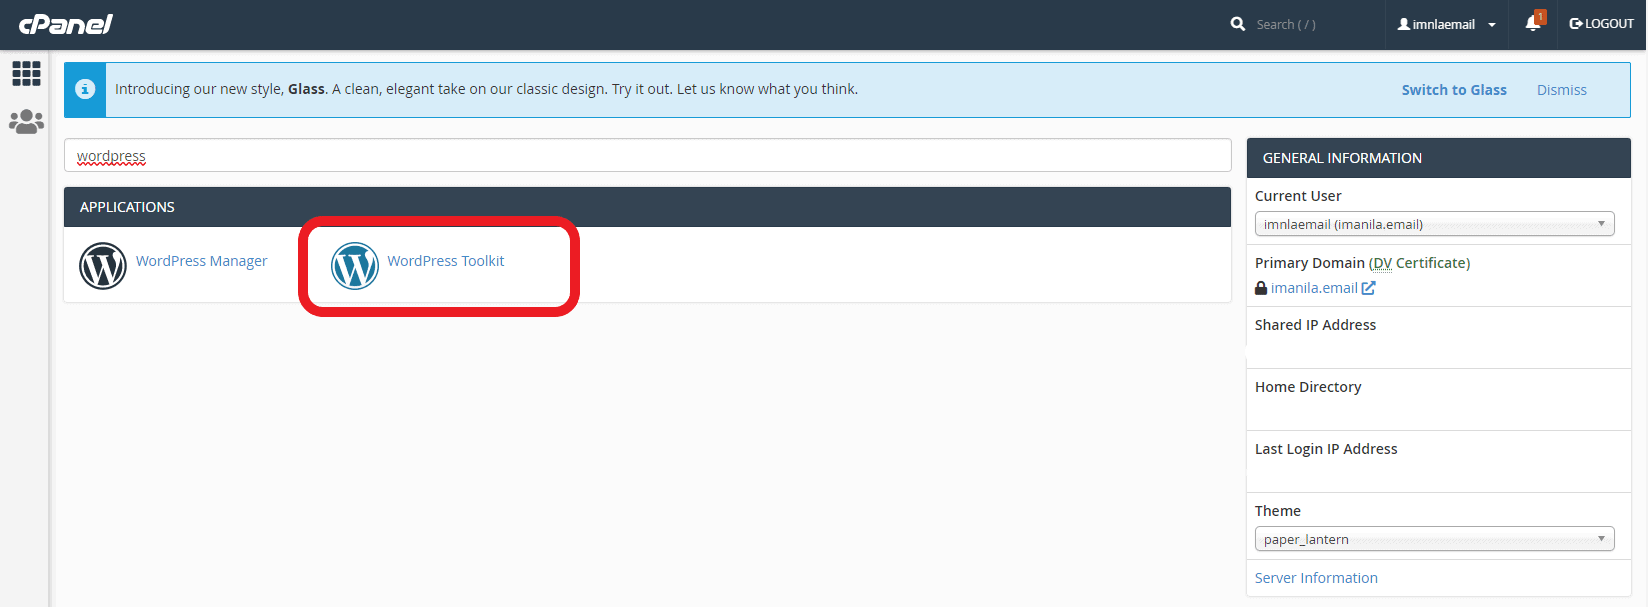
- Select Install. The installation page will open. A basic installation is fine. Use current version.
Note that the installation path does not have anything on it. In this way, the installation path will be the default root directory which is /public_html/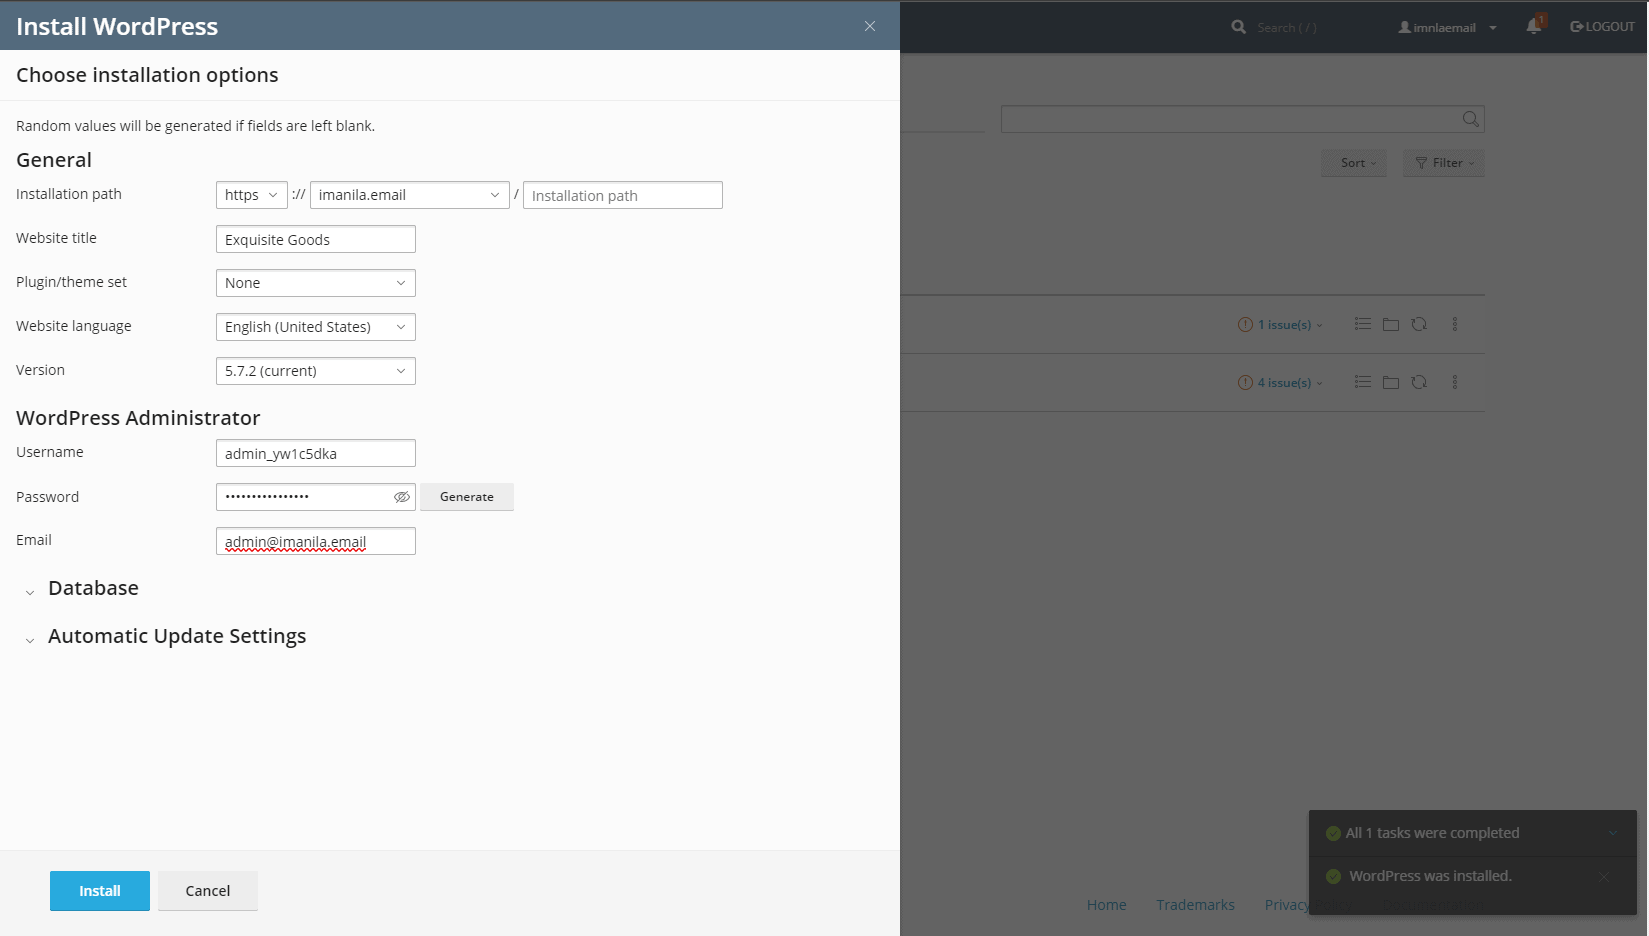
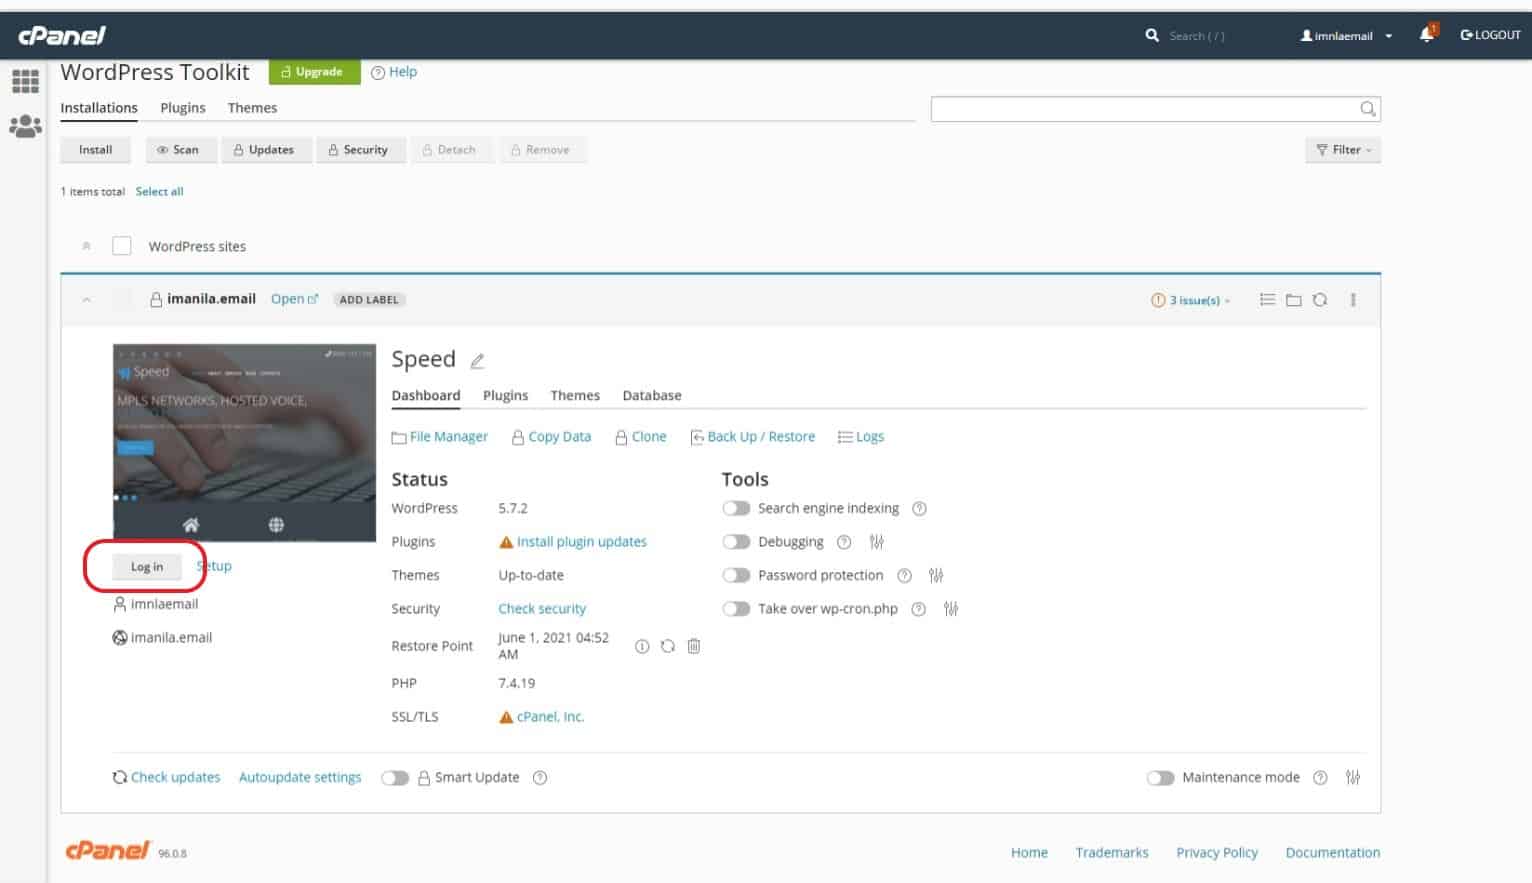
- After installation, login to your new WordPress app. Simply select Login and you will be redirected to the WordPress dashboard.
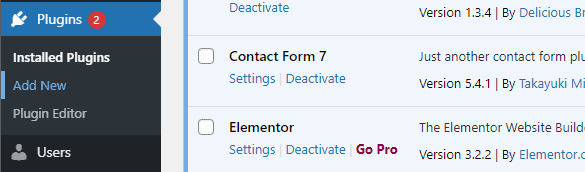
- Once logged into the WordPress console, you will need to install a WordPress plugin that will be used to import the data and files from the source website. This plugin is called All-In-One WP Migration. Navigate to the menu on the left and expand the section Plugins and select Add New as show here:
- Search for All-In-One WP Migration. From the search result, hit Install.
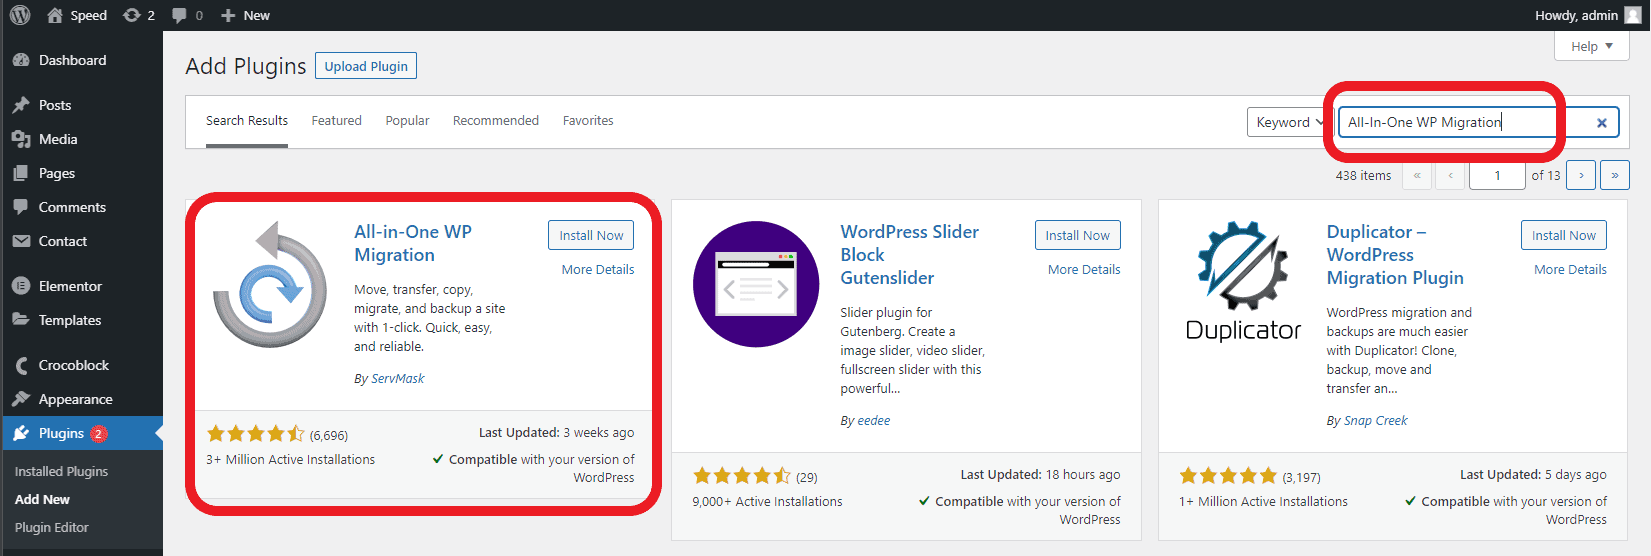
- After installation, hit Activate.
Now that the plugin is activated, you will export the files and data from the source website. Don’t close your browser window! Open a 2nd window or tab on your browser.
Export files and data from source
To migrate your WordPress website, you need to extract a copy of the data stored in the database and all files that are a part of the WordPress website. Normally this would be complicated and involve many manual steps, but fortunately, there are plugins and tools that will assist with this. For this example, we are using the All-In-One WP Migration Plugin to extract the database and files you will need to import into the new website. Once again, this is just one of the many ways to migrate a WordPress website. You may opt to use other plugins as well that does the same thing.
- Login to your source WordPress website.
- Just like the steps in Preparing your target host, install and activate the plugin, All-In-One WP Migration
- On the left side of the WordPress Admin Portal, you will see a section All-In-One WP Migration. This is where you will create the export archive. Click on Export
- Then click on Export To and select File
- Save the archive by clicking on the Green Box and the archive will be saved to your local computer.
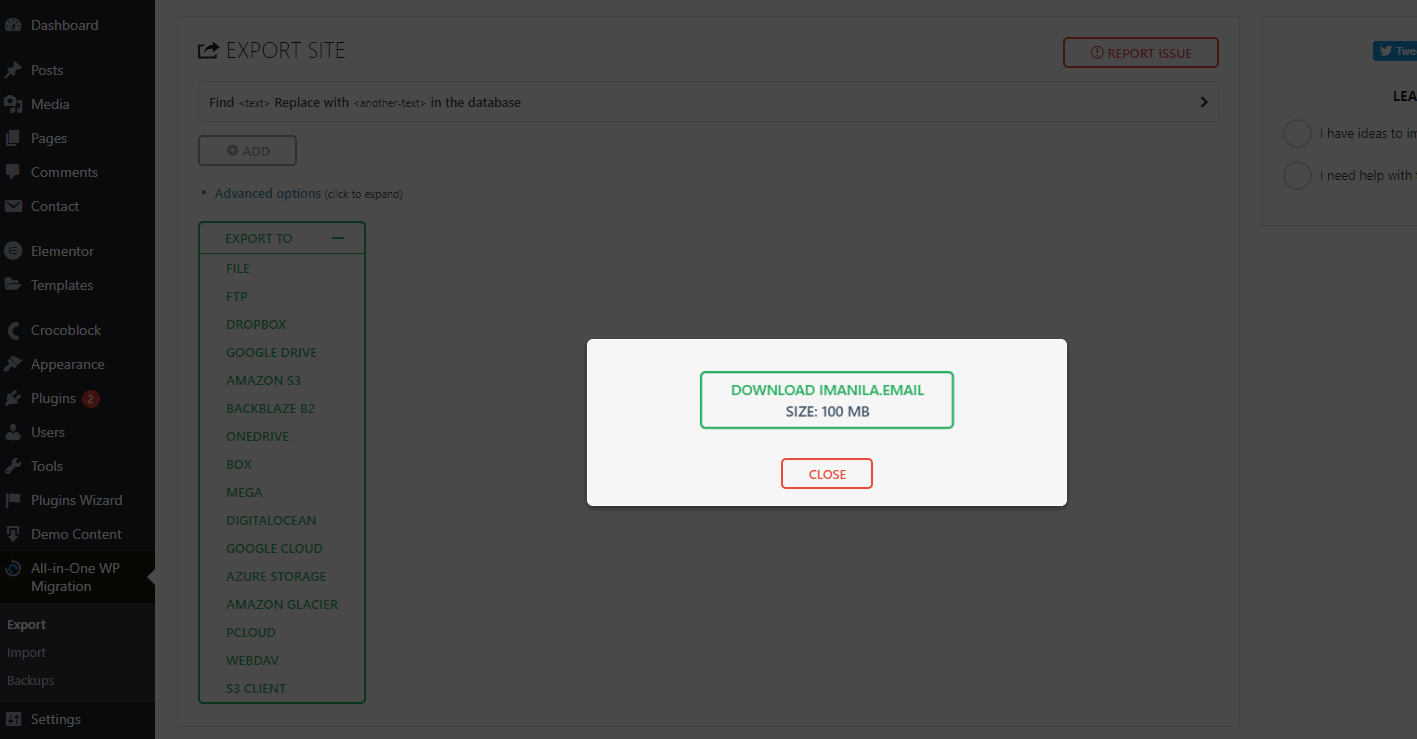
Note: Depending on the size of your WordPress website, this step may take some time. Also, due to some hosting resource restrictions, this step may fail due to the size of your WordPress website. If it fails, you may need to use other method to migrate your WordPress website.
Importing your website files and data
Now that the archive has been downloaded, you will import that archive into the new WordPress site (target). Switch back to the Admin Portal of the New website.
- In the WordPress Admin Portal, select All-In-One WP Migration on the left side, and the click on Import
- A status bar will display the progress of the archive import
- Once the import completes, you will be notified that this import will over-write any existing data and WordPress configuration.
Clean up
At this point you now have a new WordPress website running on your iManila hosting account that is identical the original website. There are a few remaining steps you will need to do to complete the migration.
- Validate that the website was imported correctly and that everything works as you expect. Adjust any WordPress settings as appropriate.
- You will need to update the DNS information for your website to use the IP address of the new WordPress instance running in your iManila hosting account.
Note: DNS update may need up to 24 hrs to fully propagate globally. - Finally, you can shut down or terminate your old hosting solution (source).
If you need help migrating your WordPress website, you can contact our Support Team about our website migration service. Send us an email to [email protected].