cPanel Email Account Management
You can create and manage email accounts of your domain through this interface.
You can create email address, configure your mail client, change your passwords and access your Webmail directly.
Create an Email Address
To create an email address for your domain, follow these steps:
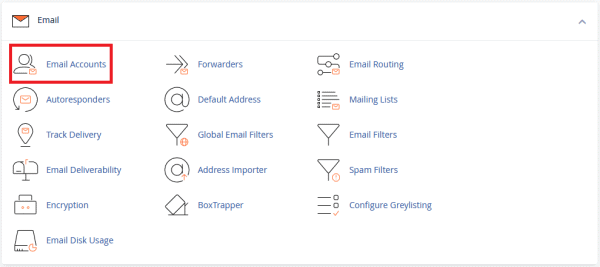
Step 1 − Click on Email Accounts link found in your Emails section of the cPanel Home.
Step 2 − In Email Accounts, you will find Create button on upper right part.

Step 3 − Type your preferred Username
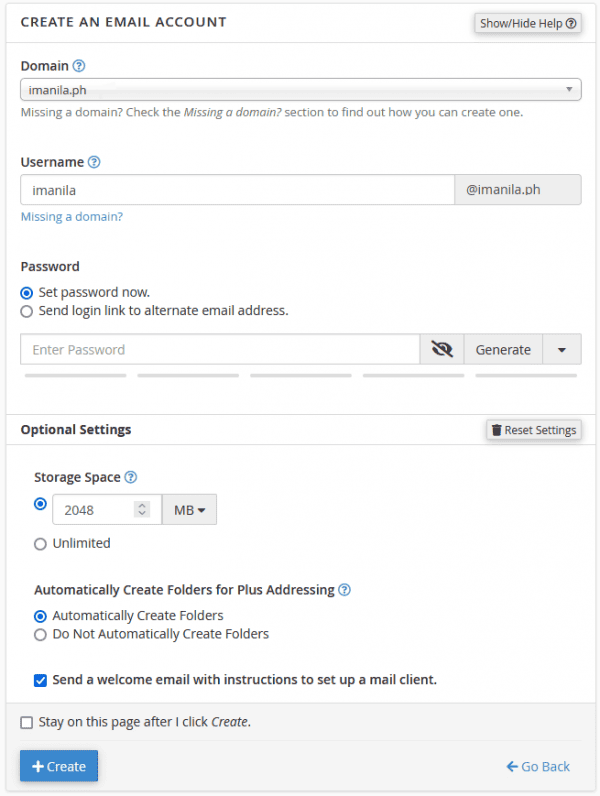
Step 4 − Choose a strong password or use the Password Generator. (Note that cPanel only accepts passwords with 80% strength). Then, assign Storage Space. It defines how much disk space this account can use. You can provide specific amount of space in MB or you can provide an unlimited quota for this. (Depending on your Hosting Package)
Step 5 − Click on Create to create an Email address associated with your domain.
Manage Email Accounts
You can manage your email accounts through this interface, you can change your passwords, change quota amount or delete the email account.
To manage your email accounts, click Manage:

Update Password
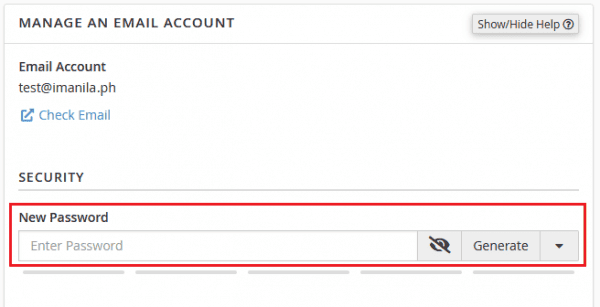
To change/update your email accounts password, click Generate or use your own preferred password.
Change Quota
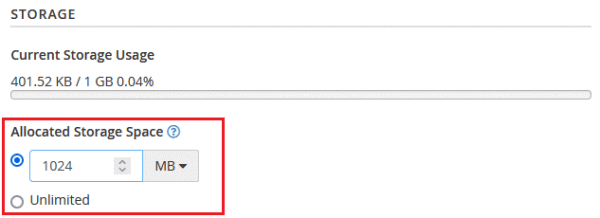
To change your email quota, click on link Allocated Storage Space or enter assigned storage in Megabytes or select unlimited option. (Depending on your Hosting Package)
Configure Mail Client
To send and receive emails with your domain from any desktop or mobile email client, e.g., Microsoft Outlook, Thunderbird, Apple Mail, etc., cPanel provides you preconfigured setting for these applications. You just need to download the settings and run it, then it will automatically configure the email client. You may need to enter your email account password. You can also manually configure the email clients for sending and receiving emails for your email client.
To download Auto Configuration Scripts or See the manual settings, click on Manage corresponding to your email account. Then click Connect Devices, to redirect to auto configuration scripts.

Once the interface is opened, you will see Auto Configuration Scripts. Additionally, it will show you the Manual settings you can use on your email client.
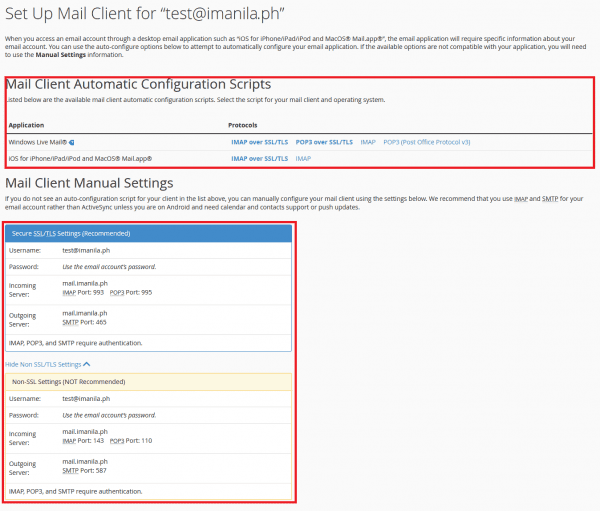
Note − There are four types of settings – IMAP and POP3, both over SSL/TLS and Non-SSL too. Using SSL sends your messages with encryption providing extra layer of security, but Non SSL does not. It is recommended that you use settings with SSL. From IMAP or POP3, you can choose anyone you want. Both will work perfectly.
Delete an Email Account
To delete an email account, just click on Manage.

Then scroll down to the bottom part of the account, then you will see the delete email account.

Note: Always backup emails (via POP3 setup) or be mindful in deleting email accounts as they are irretrievable.