How to Setup Your Email Account in Control Panel
Email accounts can also be setup via Windows Control Panel. Here’s how:
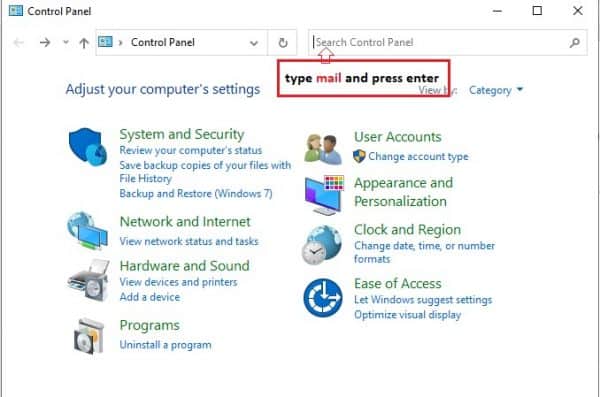
1. In the search box next to Start on the Taskbar, type control panel. Select Control Panel from the list of results.
2. Once Control Panel is open, type mail in the search bar and press enter
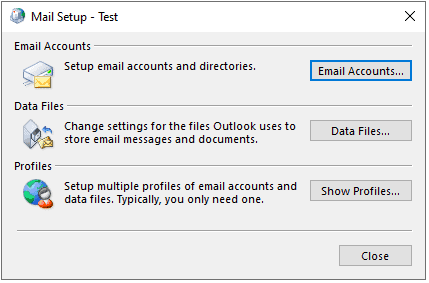
3. Click Mail to display the window for mail setup.

4. Click Email Accounts.
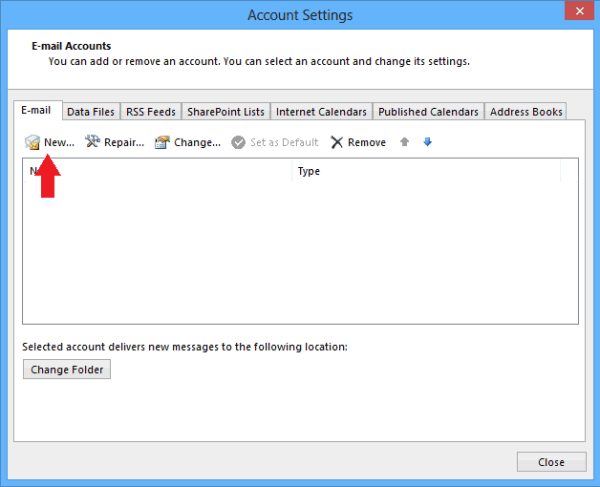
5. Click “New” since you will set up a new email account.
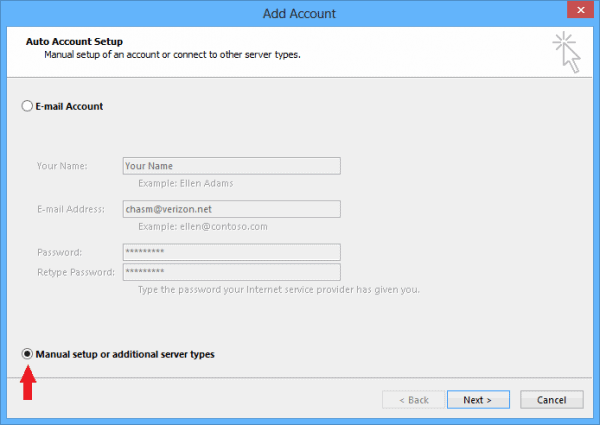
6. Click on the button that says “Manual setup or additional server types”. Then click “Next”.
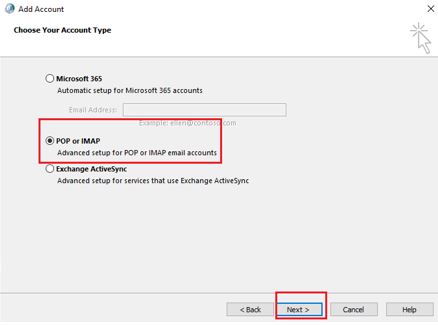
7. Choose a Service. POP or IMAP is selected by default and this is correct. Just continue and click “Next”.
Fill up the information needed:
- Your full name
- Your email address
- Choose your preferred settings, POP or IMAP
- Type mail.yourdomain.com [ex: mail.imanila.com.ph (“imanila.ph” is our domain.)]
- Type mail.yourdomain.com [ex: mail.imanila.com.ph (“imanila.ph” is our domain.)]
- Your full email address
- Your email account password
- Click More Settings to view additional configurations

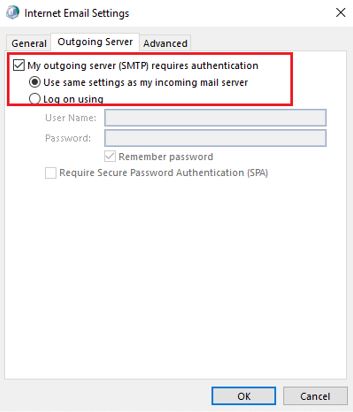
9. Select the Outgoing Server tab and select “My outgoing server (SMTP) requires authentication”.
10. Select the Advanced tab and select your preferred encryption
NOTE (for POP only): Checking “Leave a copy of messages on the server” will simply save your emails on the webmail/server. If this is unchecked, all your emails will be downloaded to your Outlook. This is OPTIONAL, but for security purposes, we suggest having this checked to have a backup of your emails on the server.
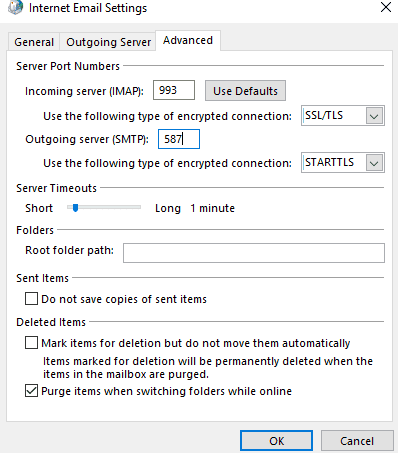
For SSL Settings
Incoming Server Port
IMAP Port: 993
POP3 Port: 995
Outgoing Server Port
SMTP Port: 465
For Non-SSL/TLS Settings
Incoming Server Port
IMAP Port: 143
POP3 Port: 110
Outgoing Server Port
SMTP Port: 587