How to Setup Your Webmail account in Gmail
Accessing your Webmail account in Gmail
1. Login to your Gmail Account.
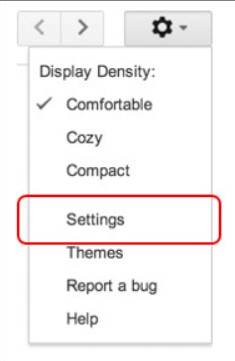
2. In the top left-hand corner, open the Settings and choose Settings.
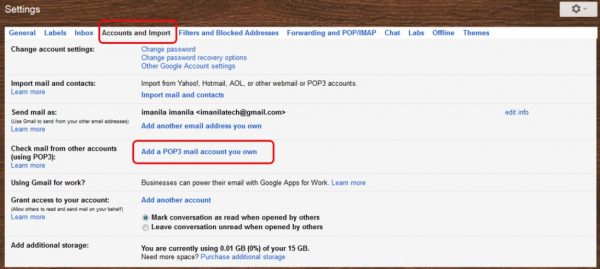
3. Click Accounts and Import.
4. Click ‘Add a POP3 mail account you own”.
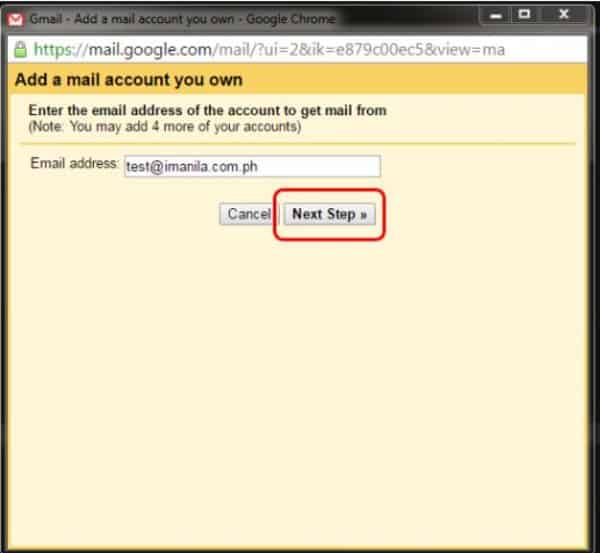
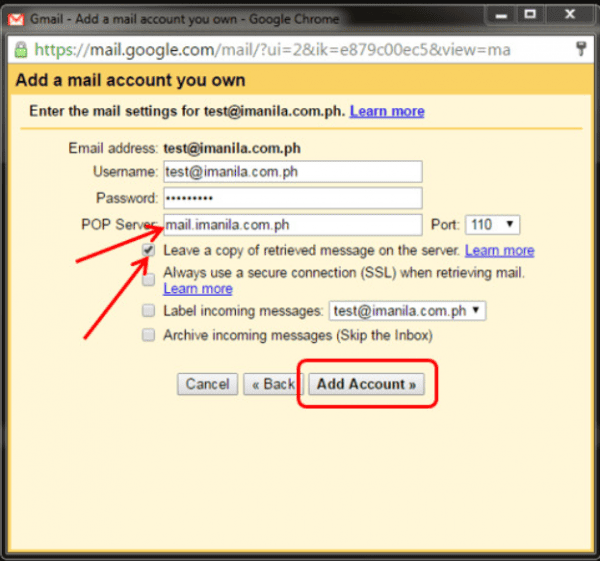
5. Enter your Email address. Then click the Next Step button.
6. Enter your full email address as the Username.
7. Enter Password for your email account.
8. Enter the POP Server. This will vary depending on if you choose to use the Always use a secure connection (SSL) option. Then click add account.
- Without SSL: This will be your domain name preceded by “mail.” (Recommended)
- With SSL: This will be your servers’ hostname. If you don’t know your servers hostname, ask your administrator regarding this or you can see that on the address bar upon logging in to your webmail.
- Outgoing Mail (SMTP)
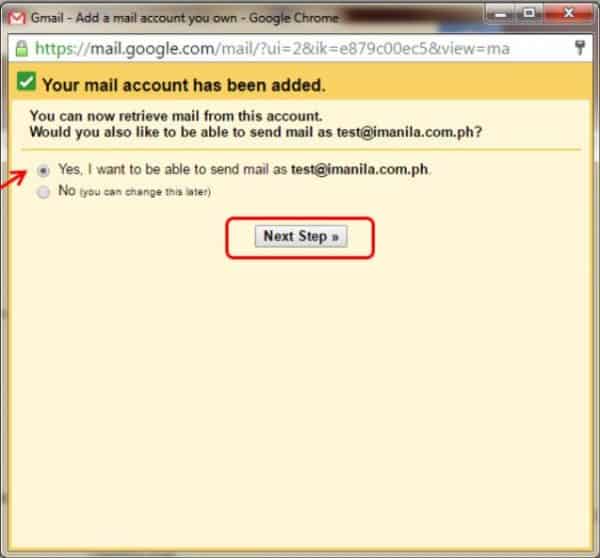
- Choose “Yes, I want to be able to send mail as [email protected]”. Then click Next Step.
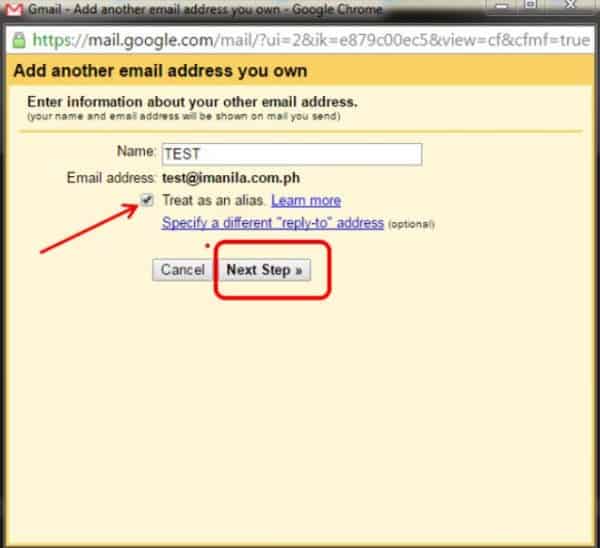
- Choose if you will use this address as an Alias. Then select Next Step.
Enter the SMTP Server.
Without SSL: This will be your domain name preceded by “mail.”
With SSL: This will be your servers’ hostname. If you don’t know your servers hostname, ask your administrator regarding this or you can see that on the address bar upon logging in to your webmail.
- Enter your full email address as the Username.
- Enter Password for your email account.
- Choose Port 587.
- Choose the Secure connection using TLS (recommended)
- Click the Add account button.

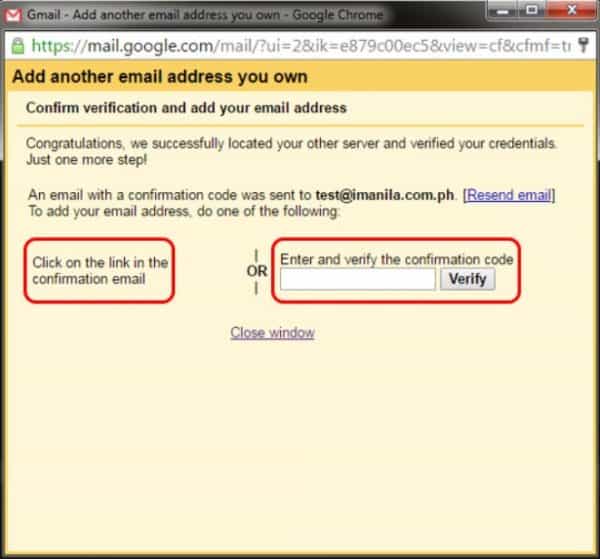
- A confirmation email will be sent for you to verify the correct email set up made. Just click the link or enter the confirmation code sent.